
When you are considering building garage shelves, the first thing you need to ask yourself is: What do you want to put on them? Are you storing tools? Holiday decorations? Cans of paint and other small supplies? This is an important question as it will dictate the types of shelving your build.
Basic Twelve Inch Shelves
Shelves that are about twelve inches deep are quite versatile and will allow you to store many items. They are also extremely easy to mount. You will need a stud finder, metal shelf brackets, a drill and bit, screws, level, wood and saw.
First, decide on the height of your shelves. Use the level to mark a straight line across the wall. Next, locate the studs. You want to be able to put some weight on these shelves, so take the time to find the studs and mark them. This way, you can attach your brackets directly to the studs for a stronger shelf.
Attach the brackets to the walls. Pre-drill the holes for the screws using a bit that is slightly smaller than your screws. The tops of the brackets should sit even with your level line. Use the saw to cut your boards to length. Most brackets have a hole in the top where you can screw the wood to the bracket. This will prevent your shelves from tipping.
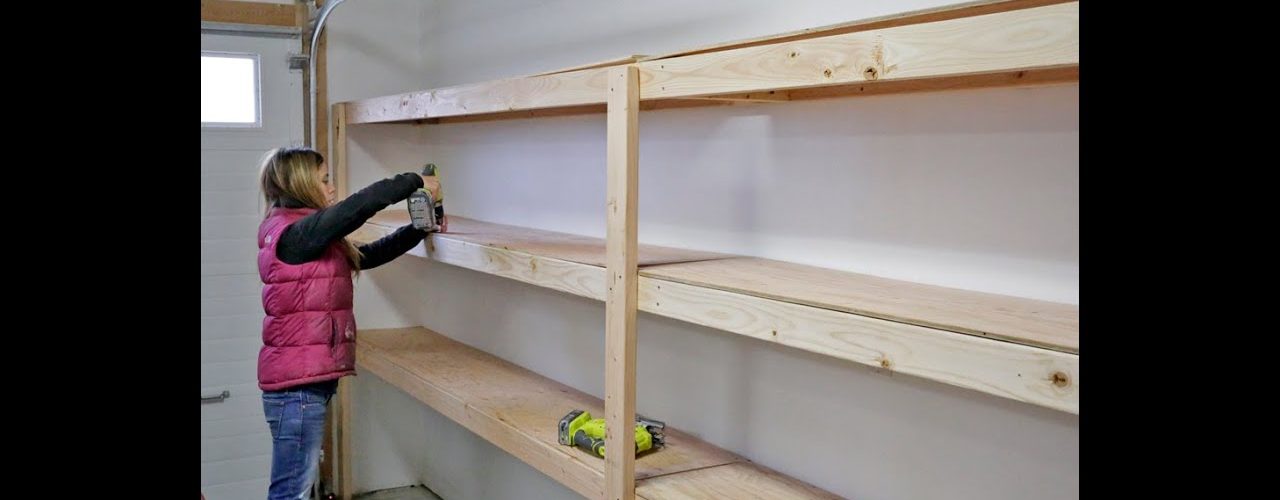
Heavy-duty Two Foot Shelves
While twelve inch shelves are fine for many things, they aren’t going to hold your larger tools. They aren’t going to hold car ramps, oil pans and other goodies. However, you can build twenty-four inch shelves that will hold almost anything, are sturdy and stable, and you can store your lawnmower underneath them.
You will need:
Hammer and nails
Drill, bits and screws
2×4’s and plywood
Stud finder
Saw
Once you have decided where your shelves will go, you are ready to begin construction. Use the stud finder to mark your studs on the wall and the joists in the ceiling. Decide on the height of your shelves, and then mark these spots on your wall using the level. Your wall will have the appearance of a large grid.
Prepare the back wall by nailing cleats to it. Cut 2×4’s to length, and then nail them securely to the studs using sinkers. These cleats will distribute and carry weight, so use two sinkers per stud.
Decide on the depth of your shelves. 2 feet is handy because you can easily have the hardware store cut sheets of plywood into 2 foot lengths. However, you can make them any width you would like. At the ceiling, measure that distance away from the wall in a series of spots. Draw a line across those spots for a straight line. A cleat will be nailed into the ceiling using sinkers and nailing into studs. The outside edge of the cleat will be even with your straight line.
Attach the front legs. 2×4’s can be cut to fit between the floor of the garage and the ceiling. At the top, you will use sinkers to nail these legs to the top cleats. Space these 2×4’s anywhere from 2 to 4 feet apart. Placing them closer will give you more strength to your shelves. You can also place them further apart, using knee braces if needed for additional strength
Secure 2×4’s across the front of the shelves at the same height as the wall cleats. Use a level to be sure they are installed at the same height. These will help hold everything tight and strong, as well as providing additional support for your shelves.
Build your cross bars for stability. The cross bars will run from the front to the back of the system. They can be nailed anywhere into the wall cleats and front 2×4’s. You can attach them with hangars, or simply nail through the sides of them with sinkers. Place them on edge for extra strength. Use the level to be sure that these cross bars are level when they are installed. You can also run them diagonally from the front 2×4 to the rear wall cleat to create additional support for your shelves.
You are now ready to lay your plywood shelves. Simply cut them and nail them into place. These do not have to be secured using sinkers. The final step is to get your tools and other goods off the floor and onto the proper shelves where they belong!
<>


