
Move the hot air out of your house and bring in the cooler, outside air with a whole house fan. These fans really only work when the temperature outside your home is cooler than the temperature inside your home. When this is the case, however, they do an excellent job of cooling your home without having to turn on the air conditioner. You can install whole house fans yourself, and here are the tips you need to do it.
Contents
What You Will Need:
- The whole house fan you have selected
- Screwdriver
- Hammer, nails and screws
- Power drill
- Drywall Saw
- 2×4 wood to construct supporting frame
- Caulk
- Spray foam insulation
- Measuring tape
Choose the Right Fan
Your square footage is an important factor when choosing a whole house fan. The fan must be able to move the hot air that is sitting in your attic. The spacing of your attic joists is also important. Take a moment to measure the distance between your ceiling joists to determine if they are 16 or 24 inch centers. Be sure that the whole house fan will fit between the ceiling or attic joists.
Read the Instruction Manual
Costly and time-consuming installation errors can be avoided when you take the time to read the manual first. Your attic fan is an investment in your home, and you want to be sure that the installation takes full advantage of that investment.
Choosing The Right Location
You will want to install your fan as close to the center as your can. Take a moment to consider the air flow through your home. Central, unobstructed hallways are the perfect location for a whole house fan. The simplest way to find the center of your home is often by viewing the layout in the attic. When choosing your location you will also want to be sure that there are not wires or pipes in the way.
The Supporting Frame is Important
The last thing you want is for the fan to fall out of the ceiling because of the vibrations. Take the time to construct a proper box or frame. This will be raised over the ceiling joists. The directions will have the exact measurements you need to use. Once your frame is properly constructed using 2×4’s you can take it to the attic and set it in place.
Prepare the Interior Ceiling
Once your supporting frame is in place you can determine where the sheetrock should be cut in the ceiling below. Place a nail through the ceiling below the four corners of the supporting frame. From below, you will be able to see exactly where the fan will be situated in the home. This is your moment to make any adjustments to the fan location. If you are happy with the spot, use a drywall saw to cut between the four nails and create the opening for the fan.
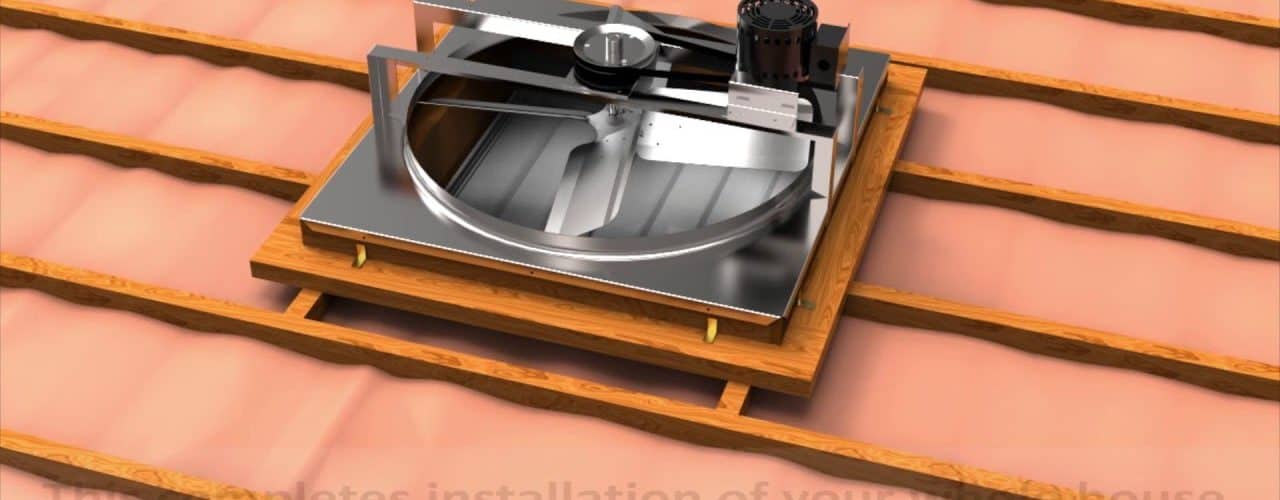
Install the Fan
The fan will probably have a gasket that will go on top of the frame. Once the gaskets are installed, you are ready to move the fan to the attic and secure it in the opening you have cut. Insulate any larger openings with spray foam and seal any smaller gaps with caulk. Proper measuring, the spray foam and the caulk will help you achieve that very important, air-tight seal. The seal is vital to the fan operating smoothly and effectively.
Connect the Wiring
Before you wire your fan, shut down the circuit at the panel. Mark the panel to reflect which fuse is carrying the whole house fan. Following the instructions in your owners manual carefully, connect the necessary wiring inside the switch box. Cover the control box, turn on the circuit breaker and test the fan.
Finishing Work
Install the cover on the opening in the mail part of the house. The screws should drill through the ceiling and into the supporting frame. Your final step is to enjoy having a cooler house, without having to turn on the air conditioner.


